This screen shows the aggregated transactions of every account you have added into Money Management. This allows a detailed view of every transaction, deposit, withdrawal, etc in every area of your finances.
-
Filtering Transactions
These transactions are displayed in chronological order over a 30 day period. You can change the date range at any time by clicking on the date above the transactions.

You can also change the order the transactions appear by clicking the columns above the transactions. For example, if you want the dates to be ascending instead of descending, click on the “DATE” column header.

If you prefer to order them according to the payee, click on the “PAYEE” column header.

At the top of the Transactions module, there are a few options to choose from:
Filter Accounts – On the top left side, you can select this option and choose which accounts you want to see the transactions for.

Export CSV – On the top right side, you can select this option if you would prefer to download all of the transactions and upload them in a different budgeting software.

Add – On the top right, you can select this option if you made a transaction with cash, or with some method that is not accounted for in your list of accounts, you can add it here. Keep in mind, to add a manual transaction, and you need to add a manual account.

Search – On the top right, you can select this option if you are looking for a specific transaction, for a specified dollar amount, or even a special transaction tag, you can search for it using the search feature.

-
Editing Transactions
If you would like to change any information on a transaction, it is relatively simple. First, click on the transaction in question.
On this pop-up screen, you can change most of the information on the screen; this includes the payee, date of the transaction, and the memo. You can also use this opportunity to place the expenditure into one of your budgets for tracking.
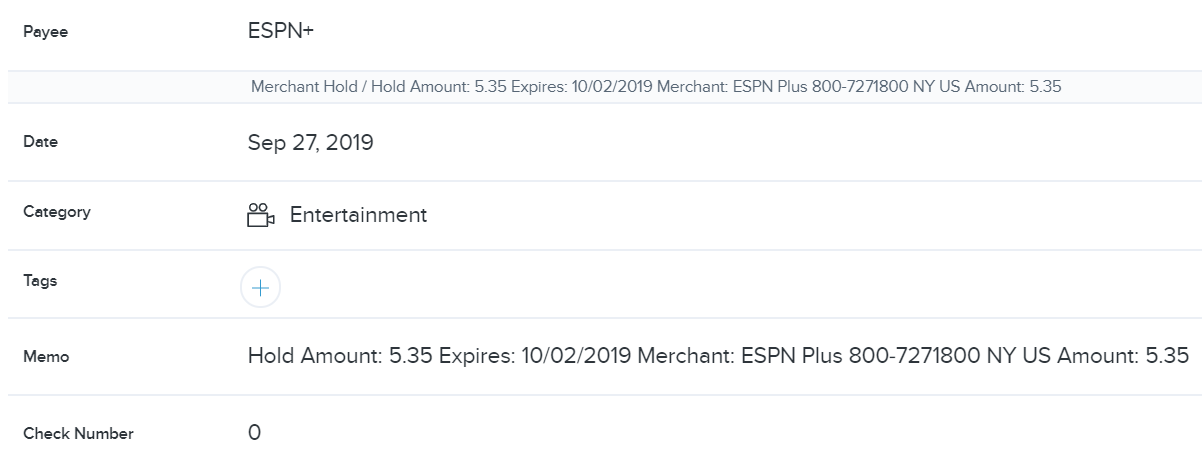
Selecting the ellipses on the top right allows you to flag the transaction for easy identification later, exclude the transaction from your history in Money Management, or split the transaction into different budgets or tags.
